(10th July 1940 – 31st October 1940)
The Battle of Britain is arguably one of the most important battles of the war. Had Germany won and invaded Britain, history may have been entirely different.
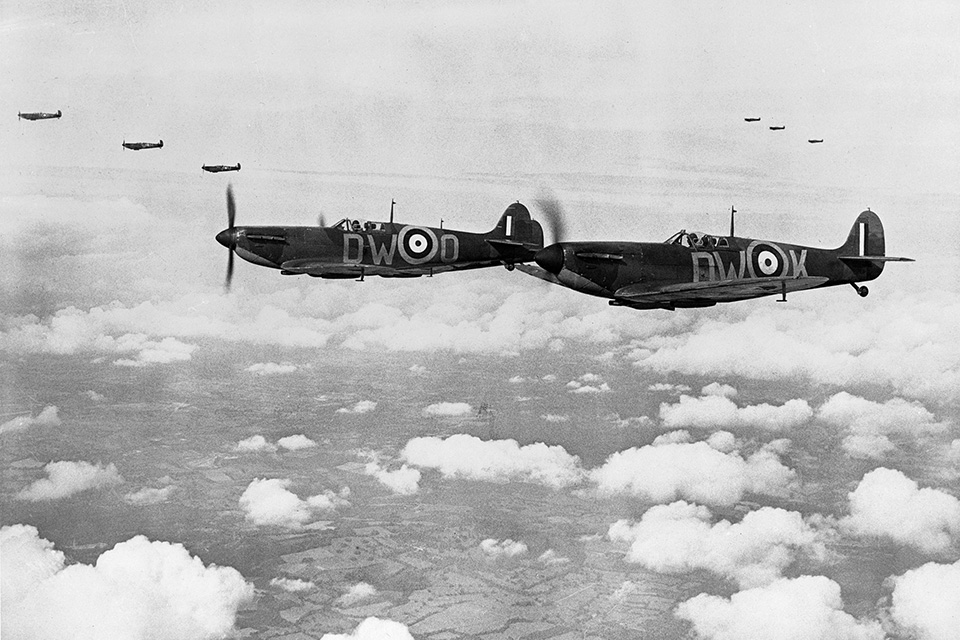
In this iconic battle the RAF prevented the Luftwaffe from gaining control of the skies over Britain and so was able to continue, still alone, its combat with Germany.
But behind the headlines about the bravery of “The Few” lies the story of RAF intrigue and in-fighting within the higher echelons of the RAF that led to distorted perceptions of the architects and commanders responsible for this victory.
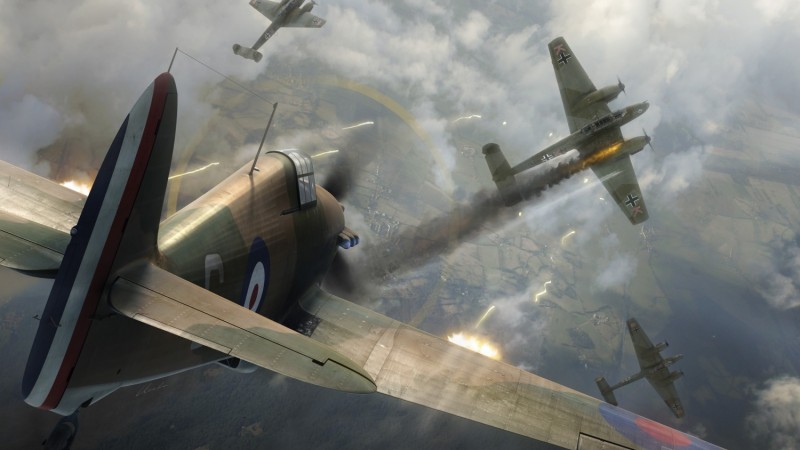
One of the RAF’s Hawker Hurricanes attacks a German Bomber during the Battle of Britain
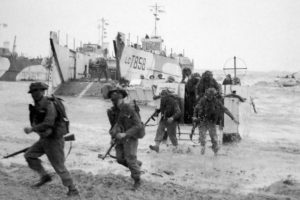
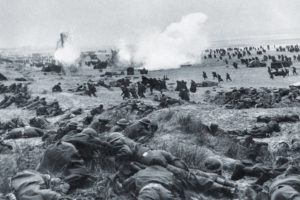
Any claim made about the Battle of Britain being the best known and most iconic battle in which Britain was involved in the Second World War would be hard to argue against. Yes there were other great military adventures that have also captured the public image – Dunkirk, Alamein, D-Day and others, but possibly the best known is the Battle of Britain.
So what makes it such an iconic battle? Perhaps it is Winston Churchill’s rhetoric calling the RAF pilots “the Few”; perhaps it is the films, the movies and the TV programmes made about the battle; perhaps it is the notion that just a few young men, even, in one case, a man without legs, stopped the Hitler military bandwagon in its tracks. As a result, perhaps, the broad understanding of the battle owes more to myth than to reality.
There are other unique and extraordinary things about the Battle of Britain:
- It was the first major battle ever to be fought entirely in the skies. This fact needs a little qualification; the other great aerial battle of World War Two was the Battle of Malta which actually started a month earlier than the Battle of Britain but did not reach its climax until two years later.
- It was the first battle that Hitler failed to win. Again, the word “win” needs to be qualified because there was no outright winner of this battle in the traditional sense. The Battle was fought over the control of air space above Great Britain which Germany needed to win if it was going to invade. So, Britain did not have to win; it just needed not to lose. The fact that Britain did not lose made it, in effect, the winner.
- The Commander of the RAF in this dogged fight has gone almost un-noticed. It is normal that the winning commander’s name becomes synonymous with such battles of this magnitude. With the Battle of Britain this never happened because internal politics within the Air Ministry created a distorted official story of the battle.
This all makes the Battle of Britain an intriguing story.
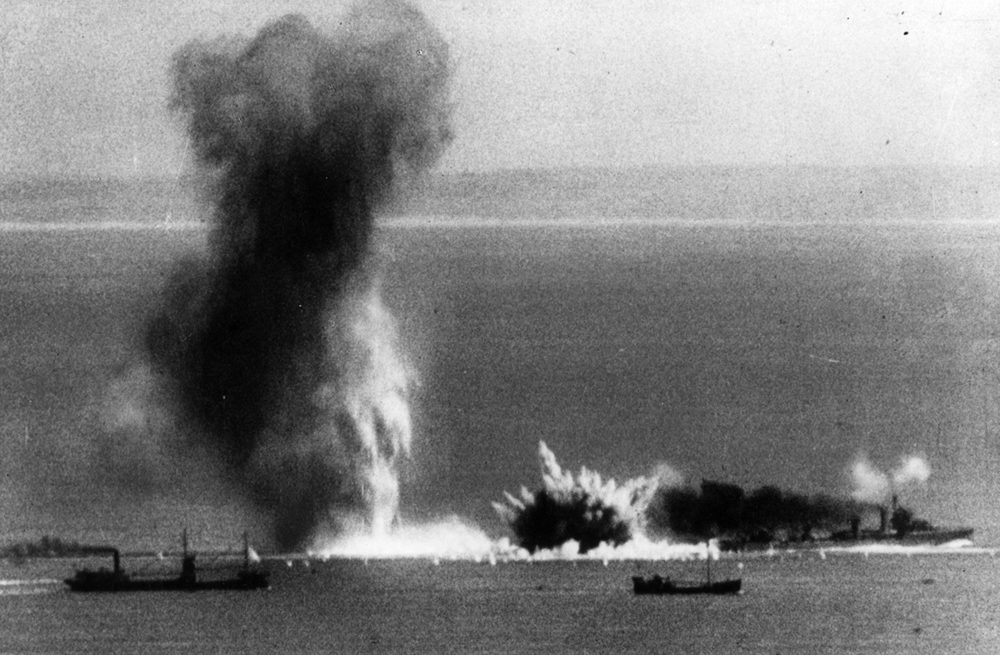
British Merchant Ships being attacked in the English Channel
Background to the Battle
In one sense the Battle of Britain was an escalation from Luftwaffe attacks upon British merchant ships passing through the Straits of Dover in the period immediately after Dunkirk. But behind it lay Hitler’s desire to neutralise Britain before pursuing his main purpose of the war, the invasion of Russia. Having already disposed of France (and other western European countries) Hitler did not want to be guarding his rear against British belligerence.
He cared not whether Britain sued for peace or acquiesced to a treaty and he was quite happy to apply additional military pressure in order to achieve either outcome. However this was increasingly unlikely with Churchill as Prime Minister although it would have been feasible under his predecessor, Neville Chamberlain. If applying additional pressure did not work, Hitler had the option of invasion and subjugation in the same manner as he had done to others before. After all it was clear that Britain was ill-prepared for war and it only had a small army which had left most of its hardware on the streets and beaches of Dunkirk.
Consequently, on the 16th July 1940, Hitler issued Directive Number 16 which ordered the Luftwaffe under Hermann Göring to nullify the RAF and thus leave Britain wishing to seek peace terms or face invasion. Göring, who was arrogant, pompous and vane, had good reason to believe that this task would be relatively easy and guaranteed to Hitler the RAF’s destruction, an Airforce that he saw as utterly outnumbered, outgunned, and outmanned by the Luftwaffe.
His view was based on the RAF’s performance in the Battle of France, where, failing to dent the Luftwaffe, they lost over 1,000 planes of which half were fighters. That left Britain with just 900 fighters with which to defend the UK. The majority of these were good planes – Hawker Hurricanes and a lesser number of Supermarine Spitfires – but 150 (or 17%) were somewhat outmoded Bristol Blenheims and Boulton Paul Defiants. Additionally, fighter production in Britain in June 1940 was a mere 446 planes although this was to be stepped up to over 900 in the months of July and August.
Thus, as with previous conquests, Germany’s initial thrust against Britain would be with airpower in the full realisation that, this time, air power would play a more important part because there was the English Channel to cross.
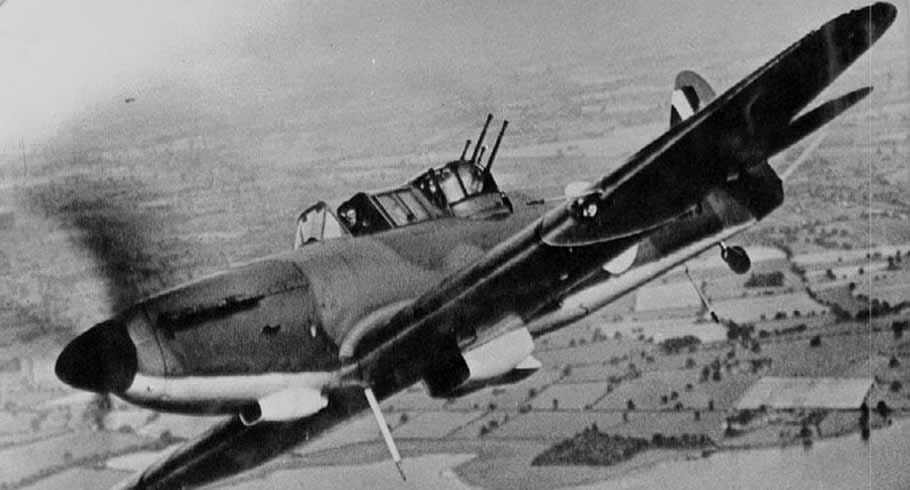
A Boulton Paul Defiant often referred to as a ‘turret-fighter’. It had no forward firing armament.
The Dowding System
Thinking that defeating the RAF would be an easy win, Göring and other senior Luftwaffe commanders failed to factor in Britain’s less-than-secret weapon – the Dowding System. This was Britain’s highly effective and sophisticated air defence network that allowed RAF commanders to respond to incoming enemy attacks and thus deploy pilots and planes to the best possible effect.
Back in 1934, as Europe started to slide towards war, Britain’s Air Ministry became concerned about the aerial defence of the country and sort to develop a new system based upon a previous system known as the London Air Defence Area (LADA) .
Meanwhile the Tizard Committee had been set up to look into claims that radio waves could be used to destroy planes in flight. A British inventor and specialist in radio waves, Robert Watson-Watt testified that there was insufficient technology available to do this. However, he suggested, radio waves could be used for the detection of planes. His submission was shown to the head of Supply and Research at the Air Ministry who, at the time, was Air Marshall Hugh Dowding.
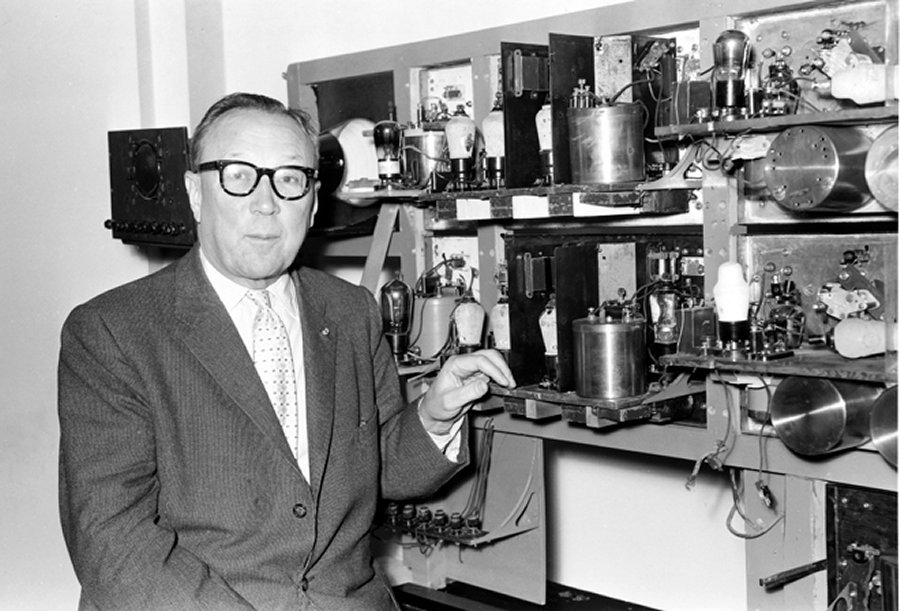
Sir Robert Watson-Watt, the inventor of the application of Radar for Aeroplane detection
Impressed with the idea, Dowding requested a practical demonstration which became known as the Daventry Experiment. Robert Watson-Watt, together with Arnold Wilkins, using little more than a set of wooden poles, some wire, a receiver and an aircraft, proved for the first time how radio waves could be bounced off aircraft up to eight miles away. Originally called RDF, this technique became better known as Radar which stands for Radio Detecting and Ranging.
Dowding quickly provided RAF funding for its development. Within months, Watson-Watt had developed radar to detect targets up to 60 miles away. By the time of the Battle of Britain he had extended this to nearly 100 miles. Plans were now made to build a chain of radar stations at 25 mile intervals along the coast in a system called Chain Home.
In July 1936 Dowding was appointed to command the newly created RAF Fighter Command. He appointed as his Chief of Staff Keith Park who had worked under Air Marshall Sir John Salmond on Britain’s aerial defence in the 1920’s.
By 1938 Dowding and Park had integrated Chain Home into a sophisticated command network. Thousands of miles of dedicated phone lines were set up that joined the radar stations and the Observer Corps to regional operation rooms and airfields. At this stage it was only functioning in London and the Thames Estuary but dozens of more radar stations were established in the next twelve months and by the outbreak of war the majority of the eastern and southern coasts of the UK were covered.
It is surprising that the Germans made little attempt to attack the radar stations. Only Ventnor on the Isle of Wight was ever put out of action for any significant period. Otherwise, this crucial element of Britain’s air defence remained generally intact throughout the Battle of Britain.
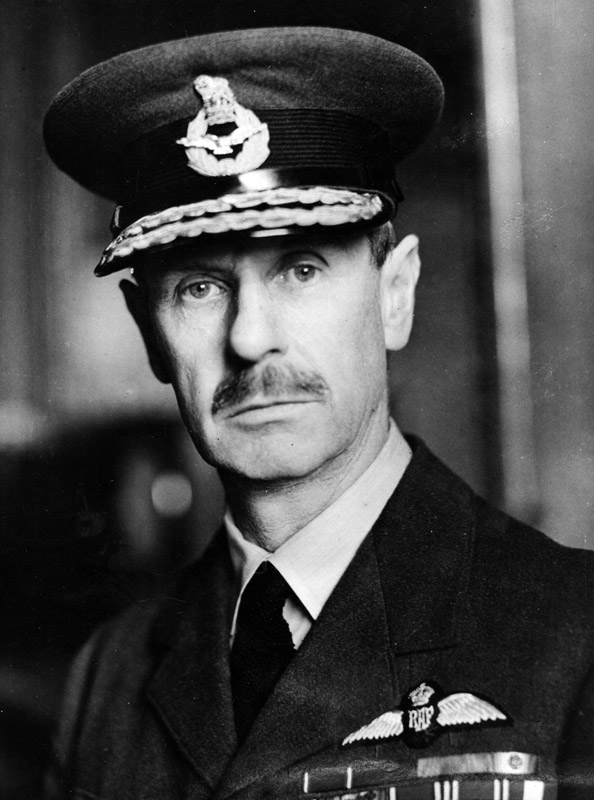
Hugh Dowding – the inventor of the Dowding System and Head of Fighter Command during the Battle of Britain
The Few – The Pilots of the RAF
In 1940, the Luftwaffe had an abundance of both experienced and combat hardened pilots. Many of them had gained experience in 1936 in the Spanish Civil War as well as Germany’s campaigns in Poland, Norway, the Low Countries and France. They viewed themselves as deadly Air Aces and saw their opponent RAF pilots as optimistic weekend warriors who lacked the skills to compete with them. But as the battle progressed they did learn to respect the RAF rivals rather more and they were to have considerable respect for the Spitfire which they regarded as every bit as good as their own Messerschmitt 109.
The RAF, on the other hand, faced some difficulties. Their existing pilots had only limited combat experience from unsuccessful campaigns in Norway and France. The other problem was recruitment. The RAF was only producing 200 new pilots per month which was half the rate of supply of new planes to the frontline squadrons. In essence the number of pilots available to fight needed to be greater than the number of planes. The ability to rest and rotate air crews was one reason; the other was that a replacement plane could be built much more quickly than a replacement pilot could be recruited and trained. So, if the RAF was to sustain a high casualty rate during the battle, a lack of pilots would become their limiting factor.
The upshot was that British fighter pilots largely had to forgo any chance of rest and rotation during the battle because there were simply not enough of them. While units were seldom rested, some individual pilots, based on their perceived individual level of exhaustion and combat stress, were rested. Keith Park, who was to command No. 11 Group in the battle, would fly himself in his Hurricane each day to visit squadron stations. Besides these regular visits being extremely good for the pilots’ morale, his prime purpose was to assess the pilots’ states of mind and general levels of exhaustion. This he would then factor in when making decisions over deployments the following day.
British pilots were generally schooled and taught to fly at RAF Cranwell, the RAF’s equivalent to the Army’s Sandhurst. However, the RAF had also established in the 1920’s the Auxiliary Air Force (AAF). Gradually AAF Squadrons were established around the country with the purpose of reinforcing the RAF in war. The pilots were volunteers. They were paid to give up some of their weekends, evenings and holidays to train with the RAF and they were subject to an immediate call-up should the need arise.
By March 1939, 21 AAF squadrons had been formed of which 20 were added to the RAF’s order of battle on the outbreak of war. This amounted to around 25% of the RAF’s frontline strength.
In the Battle of Britain, AAF pilots outnumbered regular RAF pilots and they accounted for approximately 30% of the accredited enemy kills in the battle. Eight out of the fifteen most successful squadrons (measured by number of enemy planes shot down) were AAF Squadrons.
To further alleviate the shortage, the RAF offered, at their ground crew training depot at RAF Halton, pilot training – and with it an officer’s rank for those who successfully completed the course – to individuals who would not otherwise qualify for officer training in the British military. This method proved very popular, as it created an instant route to social advancement. This was to prove to be the biggest single source of pilots that flew in the Battle of Britain.
Australia, Canada, New Zealand and other Commonwealth countries also contributed trained pilots to the RAF under an agreement with the UK. It is also worth noting that Air Vice Marshal Keith Park, the commander of No. 11 Group in the battle, was a man who had served with both the British Army and the RAF since before the days of the Battle of the Somme. But he was, in fact, a New Zealander.
Poland was the source of the largest number of overseas pilots (including those from Commonwealth countries) that flew with the RAF in the battle with around I50 of the 570 overseas pilots. About 2,500 British pilots fought in the battle.
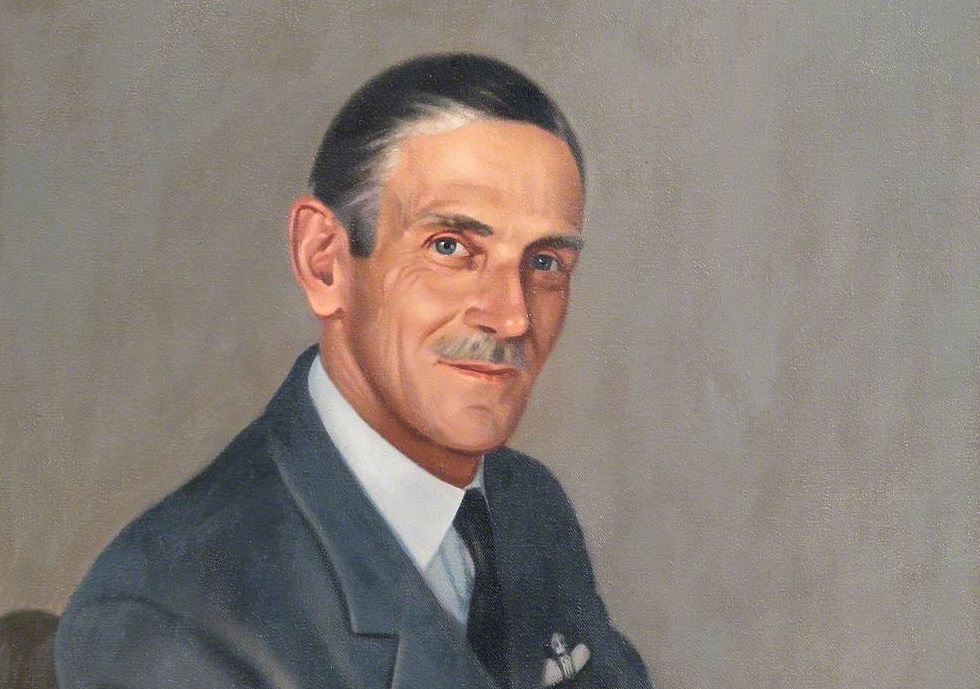
Keith Park – the man who won the Battle of Britain – commanded No. 11 Group in the Battle.
The RAF’s Deployment
During the Battle of Britain, Fighter Commanded, headed by Hugh Dowding, was split into four Fighter Groups:
No. 10 Fighter Group was commanded by Air Vice Marshall Sir Quintin Brand. This Group covered South-West England, Bristol, Bath and South Wales. Close by was Southampton which actually fell (just) into No. 11 Group’s area. But No. 11 Group was always going to be hard pressed so, during much of the Battle, No. 10 Group took responsibility for this city which was of particularly interest to the enemy because it contained one of the two sites where Spitfires were being manufactured. Throughout the Battle, Brand dutifully supported Keith Park’s battle tactics and provided, whenever Park required, air cover, enemy interception and air crew rotation.
No. 11 Fighter Group was commanded Air Vice Marshall Keith Park, Dowding’s former Chief of Staff at Fighter Command. He was appointed to this command on the 20th April 1940 in time to assume responsibility for covering the British Expeditionary Force in France after the RAF’s withdrawal from the continent. He also had the task of covering the evacuation at Dunkirk.
This Group, which protected south east England, was by far the largest, indeed it was virtually as big as all the other three Groups put together. Twenty five of the fifty two operational squadrons in Fighter Command where in No. 11 Group. At the start of the battle No. 11 Group had nearly 450 out of the total 900 fighters available for the defence of the UK.
Their task was to defend the area where the Germans were most likely to attack and where they were almost certainly planning to invade. It was also the area that included the seat of government from where the war was being run; and it was the area with the largest civilian population. It fell to No. 11 Group, for the most part, to fight the Battle of Britain. To this extent Keith Park was Britain’s General in this battle.
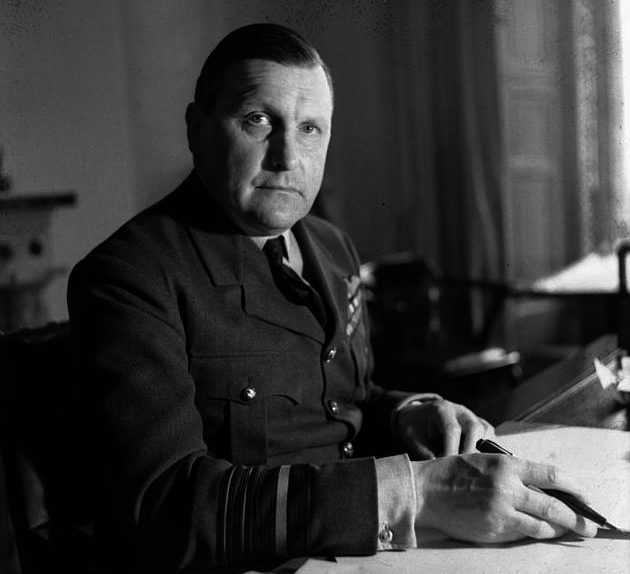
No. 12 Fighter Group was commanded by Air Vice Marshall Trafford Leigh-Mallory who was the most senior of the four Air Vice Marshalls commanding Fighter Groups. He was a rather ambitious man who had been in charge of No. 12 Group since December 1937 and who expected to be promoted to No. 11 Group in April 1940. However, he was passed over by Dowding for this promotion and he felt slighted when the command went to Keith Park. This led to Leigh-Mallory’s vindictive attitude towards Park and a bad and poisonous relationship developed between the two men.
No.12 Group’s responsibility was the Midlands and the northern part of East Anglia. His area included Coventry where the second factory manufacturing Spitfires was located. This city was to receive a fearful raid from the Luftwaffe at the end of the battle.
Additionally, Dowding gave Leigh-Mallory the responsibility for covering the airfields of No. 11 Group when their squadrons were flying operationally. This only added to his resentment of Park and led to his refusal to support Park tactically in the manner requested. When Park complained to him about his failure to cover airfields, Leigh-Mallory responded that he had been testing his Big Wing theory (which was being publicly promoted by Squadron Leader Douglas Bader) and that it took time to get the necessary squadrons assembled into formation. Throughout the battle he criticised Park and his tactics advocating the controversial Big Wing theory.
No. 13 Fighter Group was commanded by Air Vice-Marshal Richard Saul. The Group covered Scotland, Northern Ireland and the North of England. During the battle, the Germans were given faulty intelligence that No. 13 Group had virtually no fighters because they had all been lent to No. 11 Group. Thinking that attacks on Scotland would therefore face little opposition, the Luftwaffe found to their cost that this was untrue when their un-escorted bombers took a heavy toll from No.13 Group’s fighters. Additionally, No. 13 Group provided aerial cover for merchant ships against U Boat attacks in the Atlantic coastal waters of Scotland and Northern Ireland.
The German Commanders
The Head of the Luftwaffe was Hermann Göring, in fact it was his creation. He had been a World War I Air Ace and had since become Hitler’s most dedicated sycophant.
In the early years of the Nazi party, Göring had held several political offices and exhibited great energy and skill in these duties. But by the end of the 1930s, he had become addicted to painkillers and his ambition was now more focused on greed, complacency and lavish excess. This created a schism between him and his pilots. However, he remained extremely powerful and was second only to Hitler in the Nazi hierarchy. But his power and arrogance clouded his judgment.
By July 1940 the Luftwaffe had three air fleets (Luftflotte) with which to attack Britain. Two were based in France and one in Norway.
Luftflotte 5 was commanded by Col. Gen. Hans-Jurgen Stumpff and was based in Norway. His forces would take heavy losses in their only day of fighting during the Battle of Britain on 15th August 1940. That day they lost 75 planes out of 258—nearly a 30 percent loss rate – when taking on No. 13 Group over Scotland. As a result, the remainder of Luftflotte 5 was used as replacements for Luftflotten 2 and 3.
Luftflotte 3 was commanded by Field Marshal Hugo Sperrle. He was the most experienced air officer in the Luftwaffe having seen action in World War I and had commanded the Condor Legion in Spain. Luftflotte 3 was based in North France & Belgium and included a large number of bombers.
Luftflotte 2 was commanded by, former army officer, Field Marshal Albert Kesselring, the most influential commander in the battle. His Luftflotte was located in the Dunkirk area and included much of the Luftwaffe fighter strength.
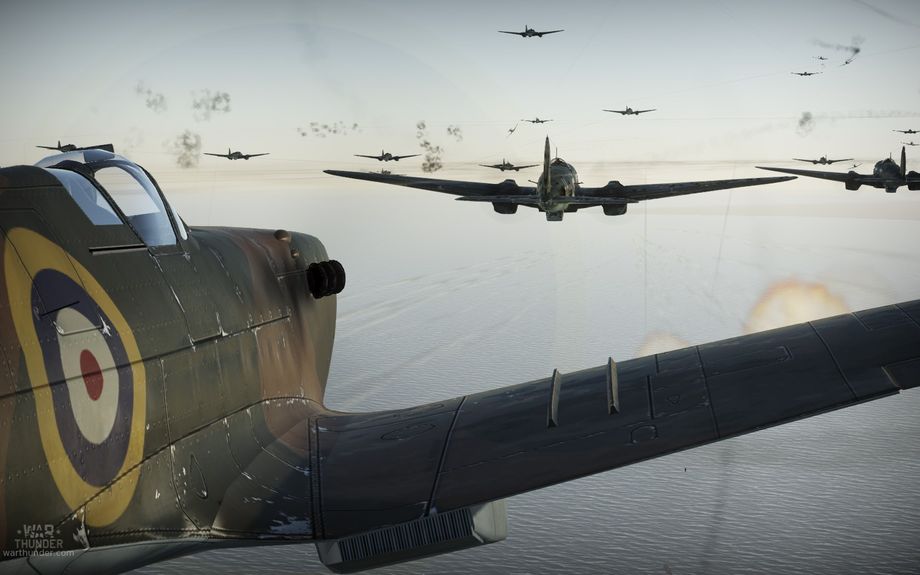
A RAF Spitfire closes on a German Bomber
The Battle
On paper in June 1940, the Battle of Britain looked one-sided. The only advantage apparent to the RAF was that they were defending their homeland. What was going to count in this battle and decide its outcome would be the tactics and leadership of the commanders on both sides.
The pilots of the RAF knew their Luftwaffe counterparts were good. Despite German numerical and tactical advantages, the leadership within Fighter Command would prove more strategically flexible and able to adapt to the requirements of the battle better than their Luftwaffe counterparts.
Keith Park’s tactics were to dispatch individual squadrons to intercept raids. One advantage of this was to disguise from the enemy his true fighter strength as incoming enemy planes were subjected to continual attacks by relatively small numbers of fighters. This constant harassing of the enemy broke up the tight German formations. As the formations fell apart, stragglers could be picked off one by one.
Where multiple squadrons reached a raid the procedure was for the more agile Spitfires to attack and distract the fighter escort leaving the slower Hurricanes to tackle the bombers. Park also issued instructions to engage the bombers in frontal attacks as they were more vulnerable to such attacks.
Phases of the battle
As the battle evolved there was a shifting tactical pattern. For example the starting date is difficult o pin down; the Air Ministry proposed 8th August as the start but Dowding believed it should be the 10th July 1940 when the Luftwaffe started harassing shipping in the Straits of Dover, saying, “Operations merged into one another almost insensibly”.
The 10th July is now generally accepted as the start date with the different phases drifting into each other. So whilst firm dates cannot be given, the Royal Air Force Museum accounts for the battle in five main phases with the following (approximate) dates:
26th June – 16th July: Nuisance Raids (“Störangriffe”): These were scattered small scale probing raids carried out by both day and night including armed reconnaissance and mine-laying sorties. From the 4th July this grew into daylight attacks (“Kanalkampf”) against shipping. The date of the 10th July is seen as the official start of the battle because that day seventy Luftwaffe planes attacked a westbound convoy in the Channel while thirty British fighters attempted to intercept them.
17th July – 12th August: Daylight Attacks (“ Kanalkampf”) upon shipping intensified which was gradually extended to attacks on ports and coastal airfields plus night raids on RAF bases and aircraft manufacturing sites.
13th August – 6th September: Eagle Attack (“Adlerangriff”). This was the main assault phase by the Luftwaffe. Their aim was to destroy the RAF in southern England through massive daylight attacks on RAF airfields. From the 19th August this was extended with heavy night bombing of ports, industrial cities and suburbs especially London.
7th September – 2nd October: The Blitz. The main focus of the Luftwaffe’s attacks shifts to day and night bombing raids on London. As their attrition rate in the battle had been much higher than the RAF, the Luftwaffe was now forced to change tactics to a bombing campaign. Adolf Galland, the Luftwaffe Air Ace and a commander in the battle later wrote, “We fighter pilots, discouraged by a task which was beyond our strength, were looking forward impatiently and excitedly to the start of the bomber attacks on London. We believed that only then would the English fighters leave their bases and be forced to give us open battle.” This comment also demonstrates how difficult Park had made it for the Luftwaffe to attack his planes with the result that by this stage the RAF had become numerically stronger in number of fighters than the Luftwaffe.
3rd to 30th October: Large Night Bombing Raids – mostly on London. Daylight attacks were now confined to small scale fighter-bomber raids designed to lure RAF fighters into dogfights.
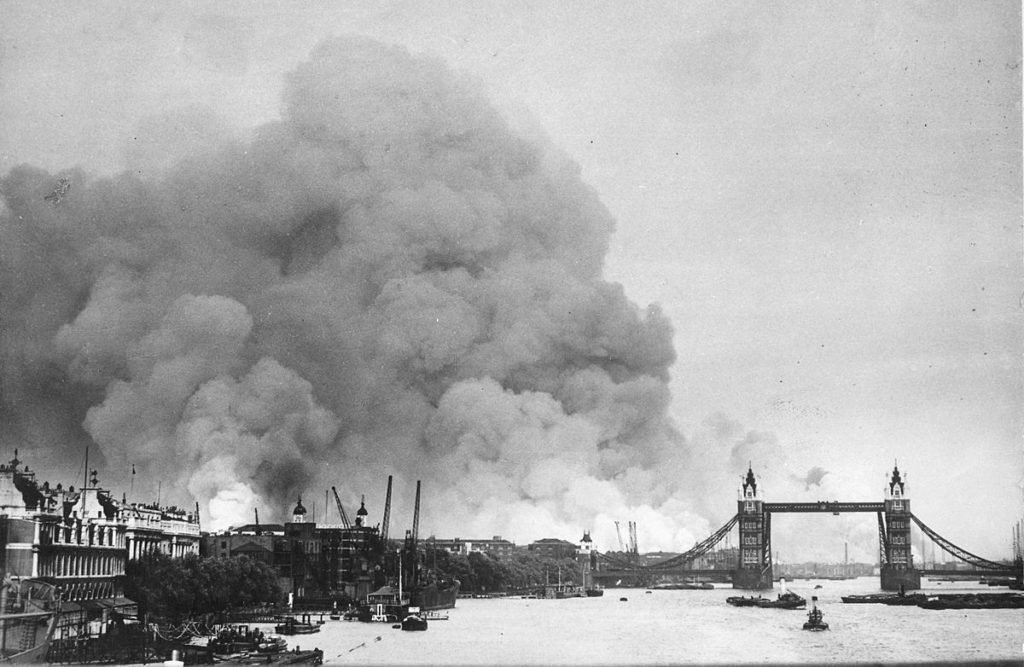
Smoke rises from Fires in the East End and the Docks of London during the Blitz
Meltdown at the Air Ministry
In April 1940, Trafford Leigh- Mallory applied for the coveted job of commander of No. 11 Fighter Group. He believed that he was the best qualified candidate. After all, he contended, he was by far the most senior and experienced candidate for the job having held his current rank and a Group Command for longer than any other candidate. However, Dowding felt otherwise. Instead he appointed his Chief of Staff, Keith Park to the post together with promotion to the rank of Air Vice Marshall.
Leigh-Mallory was furious. To some it may have appeared that nepotism was at play but, in fact, it was a strewed move. Dowding had developed a deep respect for Park. As a leader, Park was known to be tactically astute; he was tough; and he was known to have good organisational skills. He was always well liked and highly respected by the men under his command. This would be important in keeping his aircrews motivated during the battle.
Above all, Dowding knew that Park was a specialist in fighter tactics with an excellent track record as a Fighter Ace and as a leader of Fighter Squadrons dating back to the Great War.
Trafford Leigh-Mallory – he objected to being made to support Park while Park fought the battle.
In comparison, Leigh-Mallory’s experience in the First World War had been with bombing, reconnaissance and photographic operations. In the latter stages of the war he became involved in army cooperation operations which included using planes for directing tanks and artillery. Post war, having passed through both the RAF Staff College and the Army Staff College, he became a leading authority on Army and Air Force liaison and he commanded the RAF’s School of Army Cooperation. This meant that he did not have any operational experience with Fighter Units.
Additionally, Dowding had a good working relationship with Park while his relationship with Leigh-Mallory had always been slightly fractious. It was obviously going to be vital that the Head of Fighter Command could work very closely with the Commander of No. 11 Group.
A final factor was that nobody knew better that Park (except Dowding himself) how the Dowding System worked. That understanding would also be vital in the forthcoming battle.
To Dowding his decision made complete sense. Leigh-Mallory did not see it that way. He felt slighted and thought he had been relegated to a secondary role. He refused to support Park in the battle, unlike the other two Group Commanders, to the extent that his actions seriously compromised Fighter Command at critical moments and created unnecessary problems for Park. The damage being wrought to No. 11 Group’s airfields was being compounded by Leigh-Mallory’s failure to provide the cover he had been ordered to provide.
In a rage, it was reported by a subordinate, Leigh-Mallory shouted, “I will move heaven and earth to get Dowding sacked from his job.”
“I will move heaven and earth to get Dowding sacked from his job.”
– Trafford Leigh-Mallory
(as overheard by a subordinate)
Leigh-Mallory started a campaign criticising Park’s tactics claiming that he should be using a tactic called The Big Wing. This had been dreamt up by Leigh-Mallory’s friend, Squadron Leader Douglas Bader, a relatively junior officer with an aggressive energy and a love for self-publicity. His theory was for massed fighter formations of not less than three squadrons to be flown together for maximum impact upon the enemy.
Unlike Leigh-Mallory, Park quite frequently flew his own Hurricane in battle alongside his pilots. Whilst doing this, unknown to Leigh-Mallory and Bader, Park had already experimented with large wings (big formations) during the Dunkirk evacuation. He found them to be unwieldy, difficult to manoeuvre into position and rarely in the right place at the right time.
From this Dowding and Park had concluded that a Big Wing would be entirely inappropriate to use in the current battle. Anyway, the Dowding System was providing them with much more flexibility and control of their squadrons. Additionally, the Big Wing would certainly result in a much higher attrition rate which was something that had to be avoided at all costs at this stage in the war.
Amongst the Luftwaffe pilots in the battle were wing commanders Adolf Galland and Werner Mölders, two air aces with great experience having flown in the Condor Legion during the Spanish Civil War. They described Park’s tactics as “brilliant” because the Luftwaffe were never given an opportunity to really attack and destroy the RAF.
Park’s other objection to the Big Wing was that when a considerable number of planes are in the air at the same time, as with a Big Wing, then there would be the corresponding number of planes on the ground afterwards. Planes are at their most vulnerable to attack when on the ground and this would leave No. 11 Group very exposed to enemy attack especially with its close proximity to the Luftwaffe fighter bases near Dunkirk and with Leigh-Mallory’s lack of desire to provide aerial protection for Park.
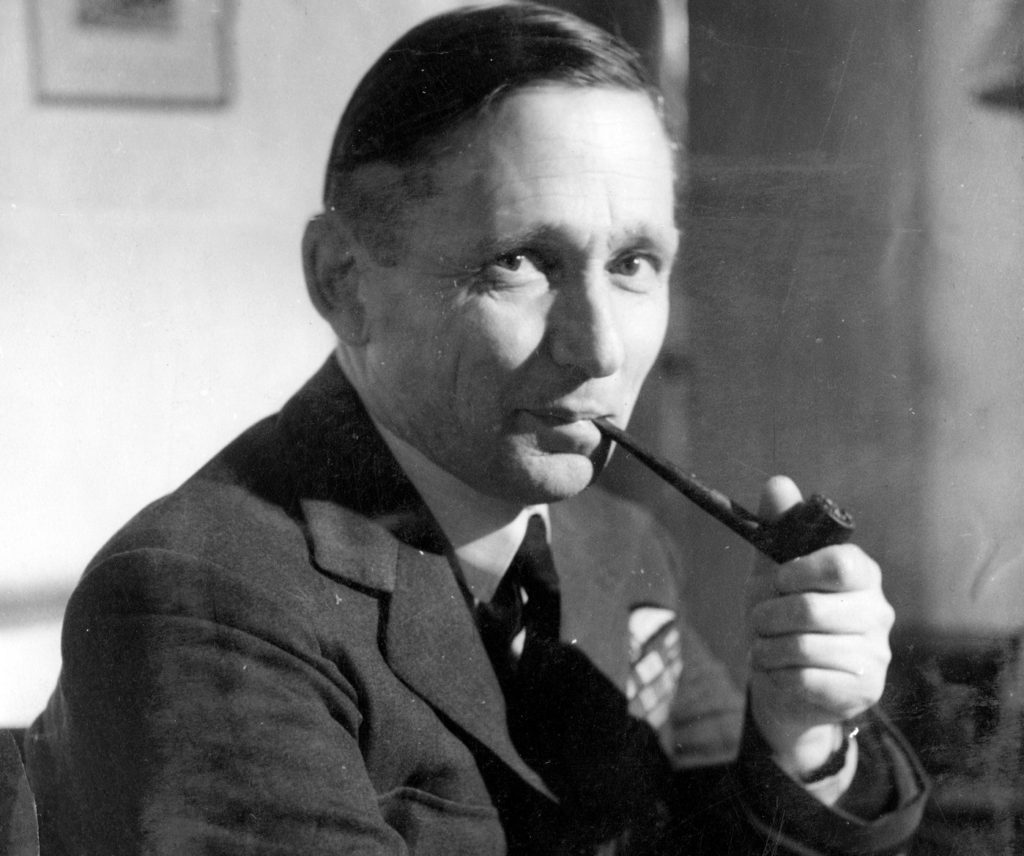
Sholto Douglas – an ally of Trafford Leigh-Mallory inside the Air Ministry who would become Head of Fighter Command
Meanwhile within the Air Ministry another quarrel was brewing between Air Vice Marshall Sholto Douglas and Hugh Dowding. Douglas was the Assistant to the Head of the RAF and, like Leigh-Mallory, his expertise was with Bombers rather than Fighters. Irrespective, he was expecting to be the next Head of Fighter Command. Dowding had been due to stand down a year earlier but had remained in post while Britain’s military situation was in the balance. Douglas, about whom Air Chief Marshal Wilfred Freeman, Vice-Chief of the RAF wrote, “Douglas is at heart a cad, but a clever one”, was resultantly frustrated at missing out on the credit for the biggest battle in the RAF’s history currently being waged.
Douglas now joined Leigh-Mallory in his condemnation of both Dowding and Park. Criticising Park for not using the Big Wing, Leigh-Mallory claimed that Park was doing insufficient to win the battle. To this he added false claims about non-existent t successes of his own Duxford Big Wing which was being led by Bader. In reality the Duxford Big Wing of No. 12 Group took too long to form up because of its sheer size. It over claimed victories and failed to provide timely support for the over-stretched No. 11 Group.
Leigh-Mallory was also busy working energetically in political circles despite his current responsibilities in the battle. He appears to have been more concerned about bringing about the removal of Park than making a constructive contribution to the battle.
One of his routes for agitation was through Bader who had contacts amongst various MPs including, he claimed, Churchill himself. The other route was through Wing Commander Edgar McCloughry who was working at the Directorate of War Organisation in the Air Ministry. He had been cultivated by Lord Beaverbrook, the Cabinet Minister responsible for aircraft production, as a source of information from within the Air Ministry. Beaverbrook appears to have colluded with McCloughry in the production and distribution of a number of treacherous memos.
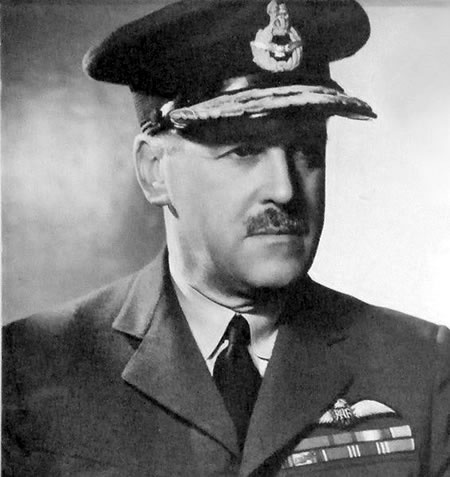
It just happened that Beaverbrook was extremely unimpressed with Air Chief Marshall Cyril Newall, the Head of the RAF, and he used McCloughry to circulate anonymous memos, which were highly critical of Newall, one of which was called A Weak Link in the Nation’s Defences.
By this point, Churchill had already decided to dismiss Newall and he was planning to replace him with Dowding. However, the Weak Link memo had by now been passed to a MP called, Irene Ward, a formidable and long-serving Conservative MP who had close links with the RAF and the SOE during the war. She forwarded the memo to Churchill with a covering letter in which she explained that the view of most in the RAF, and their overwhelming desire, was for Air Marshall Charles Portal, the Head of Bomber Command, to succeed Newall. She added that on no account should it be offered to Dowding as this would be considered by them to be a “disaster”.
Meanwhile, Newall had called a meeting of the warring parties for the 17th October. On the morning of the meeting Newall reported that he was unwell and could not attend the meeting. In his place Sholto Douglas chaired the meeting. Without Newall at the meeting Dowding and Park were out manoeuvred.
It is almost certain that Douglas’s report of the meeting was incendiary as it contained a stream of evidence against Dowding with little in his support. This was now added to the evidence and pressure from many quarters backing Portal against Dowding as Head of the RAF.
Air Chief Marshall Charles Portal – Head of the RAF from November 1940 until the end of the War
Within days Newall had been dismissed by Churchill and replaced by Portal. Shortly afterwards Portal dismissed his rival for the top job, Dowding as Head of Fighter Command. Dowding immediately resigned from the RAF and, for the rest of his life, never publicly commented upon the whole affair.
Unsurprisingly, Dowding was replaced by Sholto Douglas. In turn, about three weeks later, Douglas sacked Park and replaced him with Leigh-Mallory. At the same time Bader was promoted from Squadron Leader to Wing Commander.
Portal, Douglas and Leigh-Mallory, all Bomber Commanders, now led the RAF including Fighter Command. Whether this was coincidental or not is hard to judge. There was always a slight inferiority feeling amongst bomber pilots because the more able pilots were inclined to join Fighter Command and the less able Bomber Command. These two separate factions came steeped in their different philosophies, alliances, friendships and loyalties.
Either way it appears that none of the bomber commanders fully understood or appreciated the system and tactics used by Dowding and Park in winning the Battle of Britain without which the war would have been very different. What was more telling is that they had convinced the politicians that The Big wing was the way forward and that the tactics of Dowding and Park were now for the past, something that Park would later disprove with his victory in the Battle of Malta.
Fortunately for Britain, the Battle of Britain was effectively over. With Leigh-Mallory in command of No. 11 Group, the Big Wing tactic was employed and over the next twelve months the Group lost four British fighters for every one enemy plane shot down. If this had been the rate of attrition under Park, Britain would have lost the Battle of Britain.
With the removal of Dowding and Park it became Douglas’s responsibility to write the RAF’s official report on the Battle of Britain.
The name of Dowding does not appear anywhere in the RAF’s Official Report on the Battle of Britain. It barely mentions Park.
Churchill’s reaction was terse and he wrote the following on the official report:
“This [report] is not good. The jealousies and cliquism which have led to the committing of this offence are a discredit to the Air Ministry and I do not think that other Service Departments would have been guilty of such a piece of work. What would have been said if the Admiralty had told the tale of Trafalgar and left Lord Nelson out of it?”
As Churchill suggests, the name of great icon battles is normally closely associated with the name of the winning commander; Blenheim and Marlborough, Trafalgar and Nelson, Waterloo and Wellington. Surely the name of the Battle of Britain, Britain’s most famous and iconic battle of the Second World War, should have the name Keith Park associated with it?
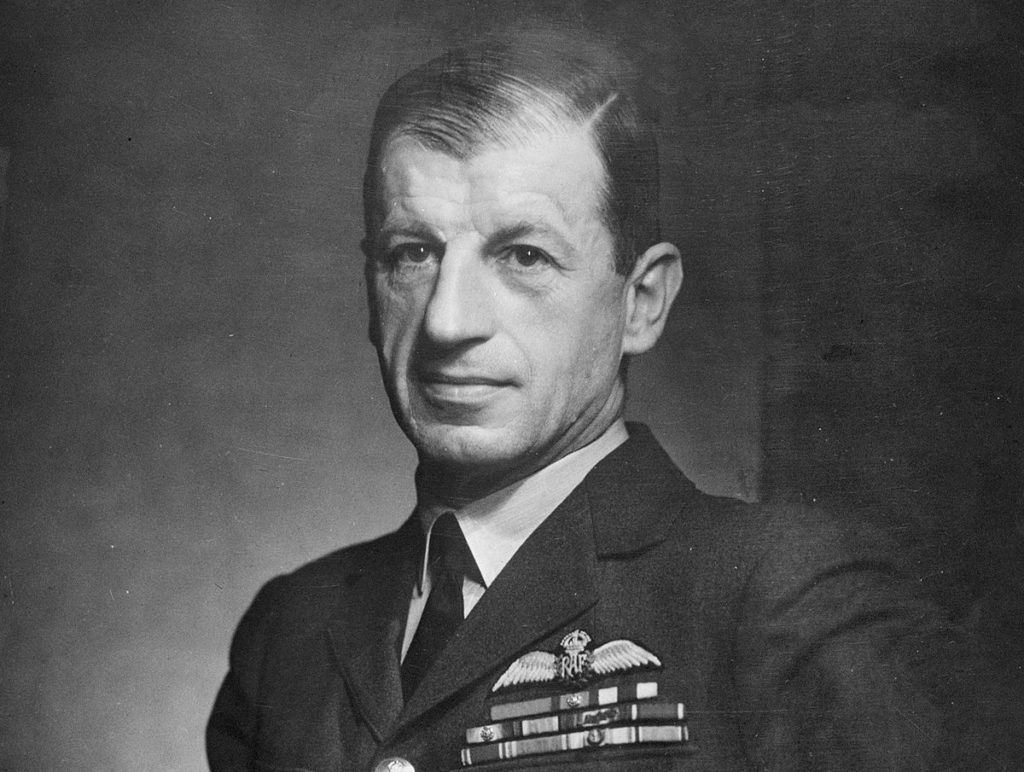
Air Chief Marshall Sir Arthur (later Lord) Tedder – taken when Deputy Allied Supreme Commander
While the battle had been raging, many miles away in Cairo another senior RAF officer who had fighter experience was watching the progress of the battle with interest. Air Marshall Arthur Tedder had sought an overseas command having fallen foul of Air Ministry politics and, specifically, Beaverbrook. He was now commanding the RAF in the Middle East and later he would become General Eisenhower’s Deputy Allied Supreme Commander for D-Day and the liberation of France.
At the end of the war he would replace Charles Portal as Head of the RAF. Clearly his assessment of the battle was somewhat different to that of his colleagues in the Air Ministry of 1940. So in February 1947, perhaps as a means of putting the record straight, as Head of the RAF he wrote:
“If any one man won the Battle of Britain, Keith Park did. I do not believe it is realised how much that one man, with his leadership, his calm judgment and his skill, did to save, not only this country, but the world.”
Post Script 1: Douglas Bader recognises Keith Park’s contribution
In 1975 Douglas Bader spoke at Keith Park’s funeral praising him and saying, “The awesome responsibility for the UK’s survival rested squarely on Keith Park’s shoulders. British military history of this century has been enriched with the names of great fighting men from New Zealand, of all ranks and in every one of our services. Keith Park’s name is carved into history alongside those of his peers.”
By now Bader was publicly asserting that both he and Leigh-Mallory (who did not survive the war) only wanted the Big Wing for No. 12 Group. He said, “It would have impractical for No. 11 Group to use it. They were located too close to the enemy and would not have enough time to assemble.”
After the war Bader had become a big friend of Adolf Galland, the Luftwaffe Air Ace who was a wing commander during the battle and who rose to the rank of General before the end of the war. It is thought that Galland’s experience of being on the other side of Park’s tactics led Bader to realise the appropriate nature of Park’s tactics in the battle.
Post Script 2: The RAF Armament Handicap
The RAF was handicapped in the battle in their ability to shoot down German bombers. This was due to the inadequacy of the .303 round with which both the Hurricane and Spitfire were armed. Additionally, the German planes had self-sealing fuel tanks.
The self-sealing tanks worked by employing two layers of metal divided by a special rubber compound. When the tank was punctured, the fuel reacted with the rubber, causing the compound to swell and close the hole. This was only a temporary fix bit it would allow the plane to return to base without losing an appreciable amount of fuel or bursting into flames.
In addition, the .303 round was not heavy, large, or powerful enough when it came to shooting at metal-skinned fighters. It was the same calibre that had been used in World War I against planes made of wood and linen. During the interwar years, armour was installed in the cockpit, protecting the pilot, and planes were now constructed of more sturdier materials. The small calibre of the bullets decreased the amount of structural damage inflicted on metal skin. The RAF upgraded the calibre of armaments after the battle.
Post Script 3: Why Lord Trenchard turned against Cyril Newall
One of the politicians’ criticisms of Air Chief Marshall Cyril Newall as Head of the RAF was that he was not a master of military strategy or tactics. This coincided precisely with the opinion held of him by the Father of the Royal Air Force, Lord Trenchard, the very man who had wrestled the RAF from the Army twenty years earlier.
Newall though was a champion of strategic bombing, something favoured by Trenchard, and they both opposed the use of bombers in direct support of ground forces.
However, at the beginning of the war, Newall realised that Bomber Command was too weak to launch a strategic offensive against Germany. He therefore succumbed to political pressure, allowing Bomber Command to be used in other ways.
This lost him the support of Trenchard who was determined to ensure the RAF’s independence and its ability to control it own autonomous air operations. From Trenchard’s point of view, this meant that the Head of the RAF had to resist attempts by the Army (like when Field Marshal Lord Alanbrooke attempted it in 1942) to establish their own Army Air Arm as a means of providing close air support for troops, and to resist the Navy from appropriating Coastal Command for themselves.
Portal, who was Trenchard’s favourite disciple, shared Trenchard’s views and demonstrated it during his time as Head of Bomber Command, something that Newall had failed to do while Head of the RAF.
Trenchard now became an important and powerful ally in support of Portal who, in turn, as Head of the RAF, would play an important role in ensuring the continued autonomy of the RAF.
WHEN BUYING FROM ANY REPUTABLE DEALER
Borrow any amount from £4,000 to £100,000