The three battles fought at El Alamein were to become the military turning-point for Britain in the War. Together with the Battle of Stalingrad in Russia, it also proved to be the turning point of the entire war in Europe.
Victory here was a strategic necessity for Britain who desperately needed to defeat Rommel and take control of the Mediterranean while also needing to prove to their new partner, the USA that they were capable of fighting and winning.
Properly resourced with help from the USA, the British Eighth Army defeated Rommel at Alamein bringing to an end three years of impasse in the Western Desert.
"Before Alamein we never had a victory. After Alamein we never had a defeat."
– Winston Churchill
The Prelude to the First Battle
On the 25th June 1942, following the Eighth Army’s rout at Gazala, its further defeat by Rommel at Mersa Matruh and the fall of Tobruk, Claude Auchinleck, the Commander in Chief of British forces in the Middle East, dismissed Lt General Neil Ritchie as commander of the Eighth Army and assumed direct command himself.
Ritchie had been planning to fall back100 miles to Fuka where he would, once again, stand and face Rommel. Auchinleck decided to avoid such a battle due to tank shortages after the Gazala defeat. Without sufficient armour, he felt, they would be unable to prevent Rommel punching through the centre of the British line or, more likely, outflanking the Eighth Army to the south as he had at Gazala.
Instead Auchinleck decided to employ delaying tactics while withdrawing his army an additional 100 miles east to a more easily defendable position. For this he chose El Alamein.
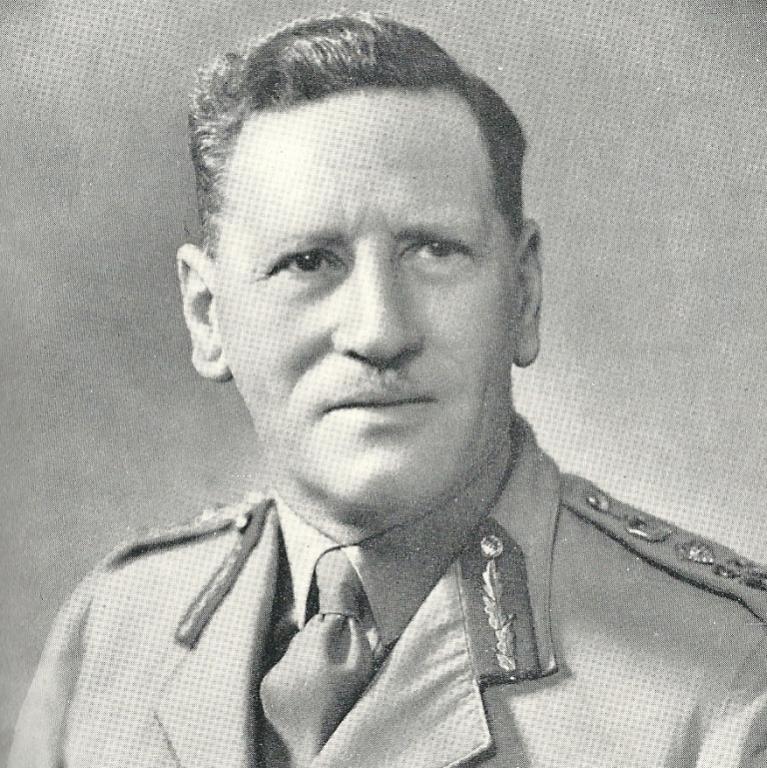
Field Marshall Sir Claude Auchinleck
El Alamein is an inconsequential railway station on the north coast of Egypt. A little more than 10 miles to the south lies the Ruweisat Ridge, a low stony peak that gives excellent observation for many miles over the surrounding desert. A further 20 miles or so to the south is the Qattara Depression, a steep-sided subterranean area that is impassable for tanks. Here Rommel would not be able to repeat his trademark outflanking manoeuvres. So, Auchinleck was now able to establish a defined front that his infantry could defend.
While preparing the Alamein positions, Auchinleck fought strong delaying actions from Mersa Matruh and through Fuka. The aim was to inflict as much damage as possible on the enemy while ensuring not to get trapped and still being able to withdraw in good order. This is easier said than done as such situations are continuously fluid making both control and communication difficult.
In five days the successful withdrawal to El Alamein was achieved in spite of some difficult and worrying moments en route. Auchinleck placed XXX Corps, consisting of three infantry divisions, in the north sector of the line and XIII Corps with two infantry divisions on the left. The remains of the 1st Armoured Division and the 7th Armoured Division were held behind the front line as mobile reserves.
Rommel arrived at El Alamein on 30th June and planned to strike immediately before the British had time to properly organise their defences. He was confident that the momentum of a quick strike would take him through the Alamein position and he could then advance to the Nile with little further opposition.
First Battle of El Alamein (1st July 1942 – 27th July 1942)
For five days, from the 1st July, Rommel attacked the British defensive position which held despite all his efforts. In attempting this, Rommel was losing tanks fast. He was also hampered by supply issues particularly fuel.
So, after five days, Rommel ordered his exhausted troops to dig in, rest and regroup. The Axis Forces extended supply lines were now being harried by the Allied Desert Air Force. To make matters worse for Rommel there was, increasingly, less shipments getting through from Italy as the RAF started to take greater control of the skies around Malta.
Meanwhile, the Eighth Army was reorganising and rebuilding, benefiting from its shorter lines of communication. Within days of the start of the battle the Australian 9th Division had entered the line in the north, and a further two Indian Infantry Brigades arrived to further bolster the defences.
By the 8th July Auchinleck was able to start harassing operations against Rommel’s positions. A bombardment scattered the inexperienced soldiers of a newly formed Italian Infantry Division, while an Australian attack took more than 1,500 prisoners, routed another Italian Division and overran the German Signals Intercept Company. The loss of the Signals Company was a major blow for Rommel who now lost the priceless intelligence from intercepted British radio communications.
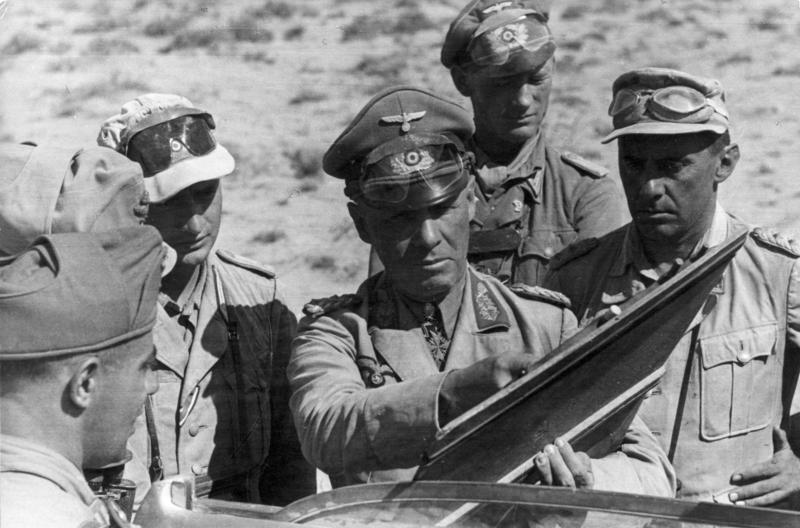
Rommel (centre) gives his instructions during the Battle
As Auchinleck’s attacks grew, Rommel found himself plugging potential holes in his defences. By committing German Panzer Divisions to counter-attacks to protect his lines, he sustained further tank losses from Allied artillery and anti-tank guns.
For two weeks, each side attacked and counter-attacked each other from their increasingly well organised defensive positions.
On the 26th July Auchinleck ordered one final major assault on the Axis line in the north near the Miteirya Ridge. But again Rommel counter-attacked. By now both Armies were exhausted and Auchinleck called a halt to further offensive operations and ordered the strengthening of their defensive positions.
The battle was a stalemate but, at least, the British had, after months of defeat, halted Rommel who was no longer in a position to make further advances.
Re-organisation
There is little doubt that Auchinleck had demonstrated quality leadership and command of the Eighth Army. He had extracted them from a precarious position, he had stopped Rommel in his tracks and he had prevented the fall of Egypt and especially the Suez Canal to the Axis Forces.
He had also created a substantial legacy of a strong and effective defensive position. Additionally he had plucked Francis “Freddie” de Guingand, from his job in Cairo as the regional Director of Military Intelligence, and appointed him as the Chief of Staff of the Eighth Army.
De Guingand just happened to be a man who got along with the next commander of the Eighth Army, Bernard Montgomery, a man known for being difficult with colleagues. De Guingand was to remain with Montgomery for the remainder of the war and helped him plan all his operations from El Alamein to D-Day to the crossing of the Rhine. About de Guingand, Montgomery was later in the war to write, “I do not know what I should do without him as he is quite first class”.
For his political masters, Auchinleck’s efforts in North Africa were too little too late. Churchill had managed to persuade the Americans to adopt the British strategy for defeating Hitler. So the British now needed to demonstrate to the Americans their military capability by defeating Rommel.
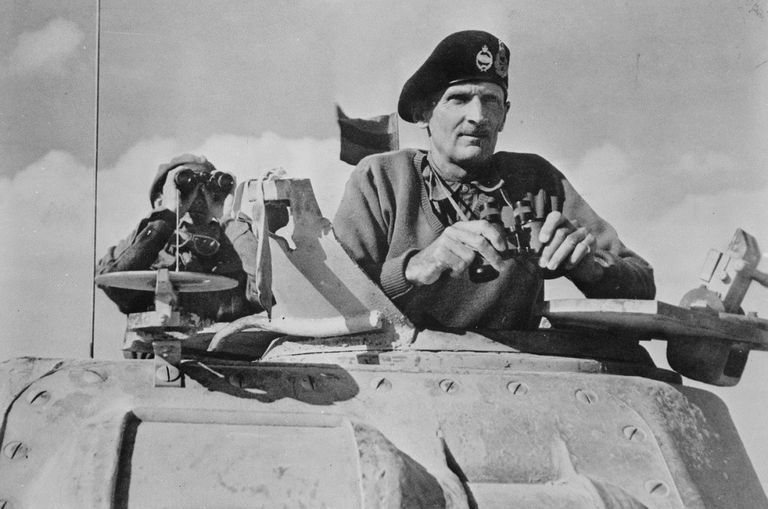
Churchill arrived in Cairo in early August and appointed Harold Alexander in place of Auchinleck as Commander-in-Chief Middle East. Alexander was the man who had commanded the rearguard at Dunkirk and, famously, was the last person to be taken off the beaches. A few days later, on the 13th August Montgomery arrived and took command of the Eighth Army.
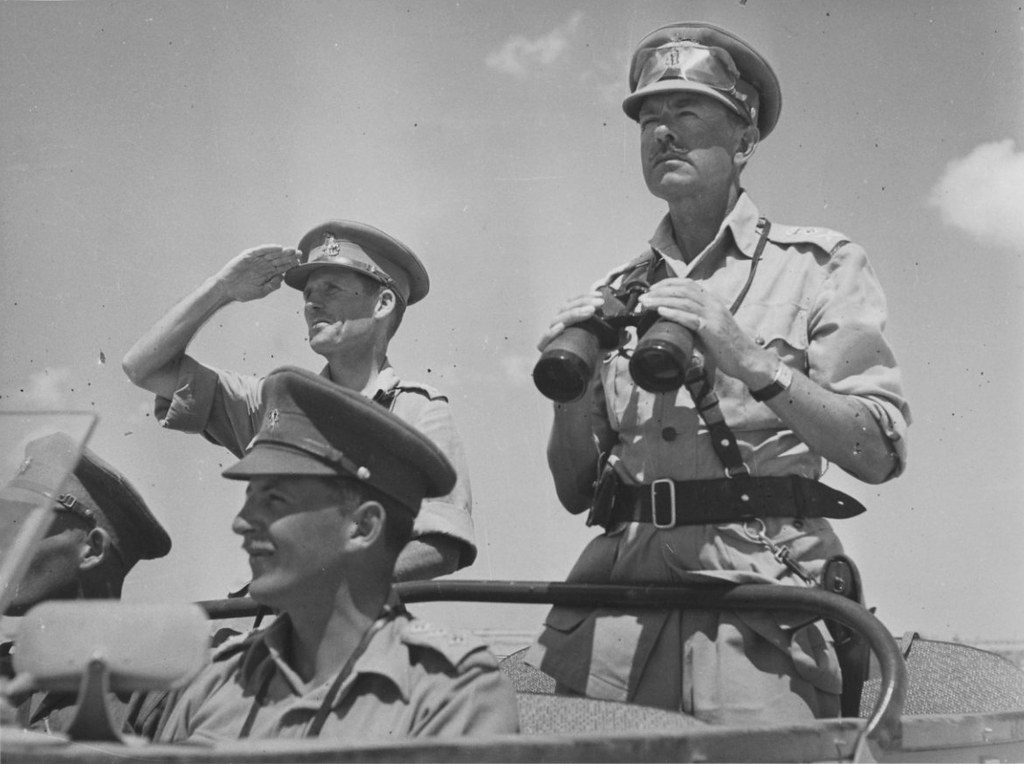
General Alexander (standing with binoculars)
Alexander immediately set about ensuring that the Eighth Army was properly resourced with both men and equipment. The Eighth Army was enlarged in size from two Corps to three. The number of tanks was greatly increased with the arrival of the Sherman. This was a British re-designed American tank, which was to become the armoured backbone of the British and American armies for the remainder of the war. Additionally six-pounder anti-tank guns arrived to replace the obsolete two-pounders.
Meanwhile Montgomery focused on re-training the Eighth Army and improving its morale. He dispelled notions that the British Army was inferior to the German Army and that Rommel, the Desert Fox, was an invincible commander.
Battle of Alam el Halfa (30th August 1942 – 5th September 1942)
By early August British Military Intelligence had become aware that Rommel was planning a major armoured assault on the southern section of the British line. Auchinleck and de Guingand had already drawn up contingence plans to deal with such an attack but it was left to the new commander of the Eighth Army to execute the plans.
The expected attack came on the 30th August. Rommel believed that there was a weak point in the southern sector of the British line—between Munassib and Qaret El Himeimat—and that it was lightly held and lightly mined. He realised that he was unlikely to surprise the British with a frontal attack. So he planned to use speed, breaking through the southern sector rapidly to cut the Eighth Army’s communications, throwing the enemy off balance and disjointing its defences. He would then turning north in a sharp left hook cutting Allied supply lines and surrounding enemy units in the north sector. This would leave open his conquest of Egypt and the capture of the Suez Canal.
From the start, things went wrong for Rommel. The RAF spotted Axis vehicles concentrating for the attack and unleashed several successful air attacks on them.
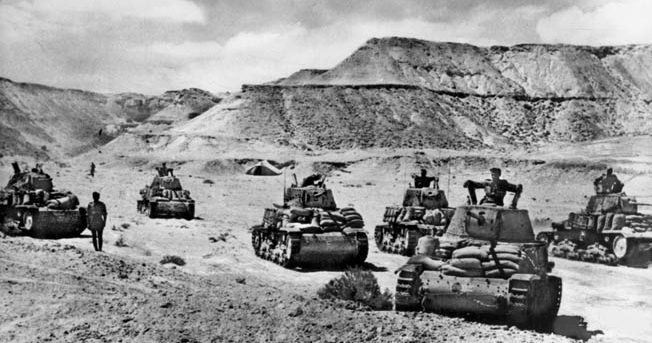
Italian Tanks preparing for an attack
Despite these difficulties, Rommel’s armour had crossed the British minefields by the following midday and had wheeled left ready to carry out their main attack. This happened to be directly towards where Montgomery had prepared defences on the Alam el Halfa ridge.
Here the British had dug in their tanks and anti-tank guns. They were under strict orders from Montgomery to spare their tanks for the next offensive and to remain in their defensive positions. So, unlike previous encounters where the British cavalry had charged the enemy and had been picked off by Rommel’s tanks and anti-tank guns, this time the roles were reversed. Rommel’s tanks were being destroyed as they came onto the British guns which were supported by allied air attacks who also accounted for a large number of Rommel’s transport vehicles.
After five days trying to break the British defensive position around Alam el Halfa, Rommel decided to abandon the offensive citing a lack of fuel, Allied air superiority and the loss of surprise. He had also sustained double the casualties – 3,000 – compared to just over 1,500 in the Eighth Army.
Second Battle of El Alamein (23rd October 1942 – 11th November 1942)
After Alam el Halfa, Rommel’s army had little option other than to dig in and waited for the Eighth Army to attack. His supply position was not improving; the British were tightening their control of the Mediterranean and, for Germany, the priority was now the Russian front. Meanwhile Rommel was aware of the growing strength of the Eighth Army.
Deception plans were now employed by the British. Dummy tanks made form wood and canvas were deployed behind the northern sector of the British lines. As new Sherman tanks arrived they replaced the dummy tanks which were then moved to a position in the southern sector of the line. To add to this deception a dummy fuel pipeline was also dug all the way to the southern sector.
This made the Germans think that the British were undertaking a build up of armour in the south and that this, therefore, may be the forthcoming point of attack. The outcome was that Rommel’s deployment of his most effective asset, his Panzers, was compromised when the attack eventually came in the north.
In late September Rommel fell ill and returned to Germany on sick leave. General Georg Stumme was transferred from the Russian front to take his place.
Before leaving, Rommel organised the defence and also wrote a long appreciation of the situation to the German High Command (“OKW”). He set out the essential needs of his Army in the full knowledge that the Eighth Army would soon be strong enough to attack.
Rommel pinned his hopes on the German forces fighting at Stalingrad to quickly defeat the Red Army and then move south through the southern Caucasus Mountains and threaten Persia (Iran) and the Middle East from where Britain obtained its oil supplies.
This would leave Britain having to fight on two fronts in the Middle East and they would have to draw off large numbers of British and Commonwealth forces from the Eighth Army to reinforce the Ninth Army in Persia. The British would then be unable to attack his army.
Rommel hoped to convince OKW to reinforce his forces for the eventual link-up between his Afrika Korps and the German armies fighting in southern Russia.
Meanwhile, Montgomery was planning a 12-day battle in three stages which he described as, the break-in, the dogfight and the final breaking of the enemy. The aim was not just to defeat Rommel but to do so in such a way that would degrade his army so it was no longer a threat in North Africa.
In reality the battle was to last for 19 days and was in five stages: theBreak-in, the Crumbling Operation, the German Counter, Operation Supercharge, and the Break-out.
Montgomery in his Command Tank
On 23rd October 1942 Montgomery launched the first phase of the battle (called Operation Lightfoot) with a five and a half hour bombardment. (Eight hundred and eighty two guns fired approximately 529,000 shells.) This provided cover for the infantry to move forward to secure ground and for the engineers to clear two corridors through the German mine fields through which tanks could move forward.
In reality there were limited gains for the British on the opening days. The Axis, however, suffered a serious casualty when General Stumme collapsed and died from a heart attack on the second day of the battle. But Rommel was already en route and resumed command when he arrived on the evening of the following day.
Even though the enemy’s counter-attacks were largely unsuccessful, Montgomery’s plan was not entirely going to plan and he was forced to change and adapt as the battle progressed. It was clear that the Germans were not going to be shifted easily and soon Montgomery had to abandon his southern corridor.
Instead Montgomery found himself having to grind the enemy down in what became known as a Crumbling Operation. Meanwhile, the British were achieving air superiority. As the British secured and destroyed Axis airfields the importance of the air battle became clearer as the Desert Air Force was able to pound German positions and attacked their vulnerable supply lines.
By 1st November Rommel was in difficulty. Although his troops had fought doggedly and inflicted considerable casualties on Allied forces, Montgomery’s armour now outnumbered Rommel’s by roughly ten to one. Rommel’s tanks were increasingly short of fuel and desperate efforts were being made to airlift fuel from Greece.
On that day he asked Hitler for permission to withdraw. The reply came the following day with Hitler issuing his customary “standfast” order which was supported with promises that, “Considerable air force reinforcements are being sent”.
Rommel was stunned by the reply and later wrote, “For the first time in the African campaign I did not know what to do. A kind of apathy took hold of us as we issued orders for all existing positions to be held on instructions from the highest authority.”
Montgomery was now piling on the pressure. On the night of 3rd/4th November, he ordered three infantry brigades that had been held in reserve to advance to the Rahman track as a prelude to an armoured break out. By morning further infantry brigades had also moved forward and had captured enemy positions.
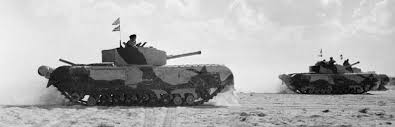
British Tanks Advance
Now the 1st, 7th, and 10th armoured divisions cut through Rommel’s lines in the gap that the infantry had opened up. With his lines compromised and no further reply back from Germany for his second request to retreat, Rommel ordered a general withdrawal.
The delay in ordering a withdrawal meant that a great number of Rommel’s troops and armour were now cut off from their line of retreat resulting in around 30,000 being taken prisoner. As would happen at Stalingrad, Hitler’s refusal to give ground achieved nothing other than increasing his losses on the battlefield.
However, at this point Montgomery hesitated and Rommel was able to break away with the German 90th Light Division securing the German retreat. Over the next six days Montgomery pursued the remains of Rommel’s army who did not stop until it reached Tunisia.
The British victory at Alamein and, a few months later, the Russian victory at Stalingrad mark the watershed of the Second World War in Europe. Before these battles the Axis carried all before them. From this point on the Axis would be on the back foot. The Battles fought at El Alamein were truly a pivotal moment in the War.
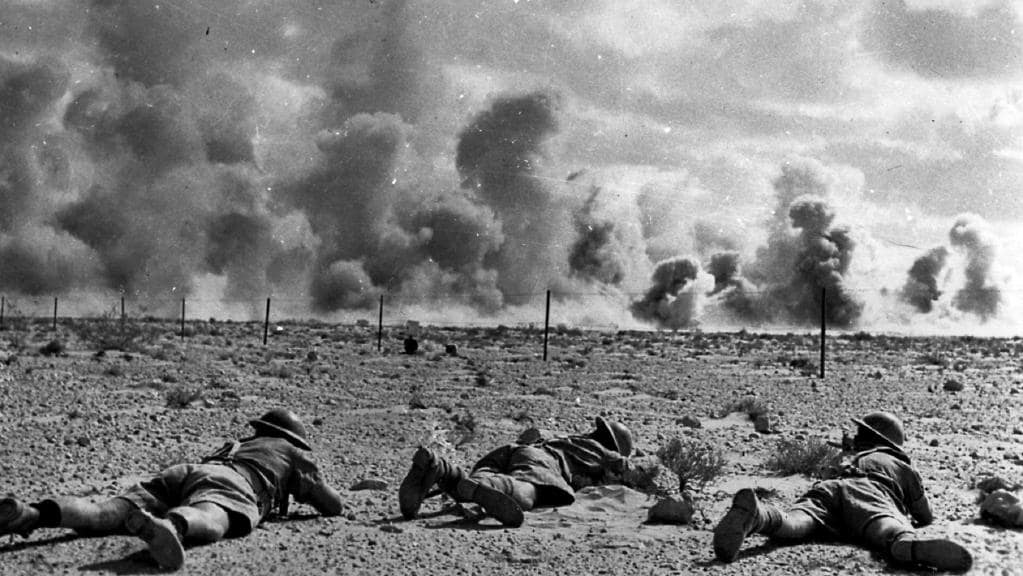
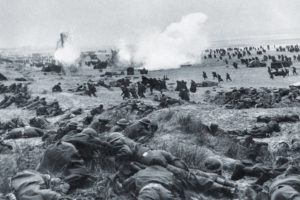
Australian Infantry tacking cover during the First Battle of Alamein
Footnote:
The story of this battle has been told as a British victory over a German-Italian army. This is because the Eighth Army was a British operational unit which was run as part of the British Army. However, this in no way belittles or down-plays the part played by units from other Commonwealth countries that contributed to the Eighth Army and who played an important and distinguished part, most notably serviceman from Australia, New Zealand, South Africa and India.
To find out more about the Battles of Gazala & Tobruk mentioned above, click below on Other British Battles of World War Two.